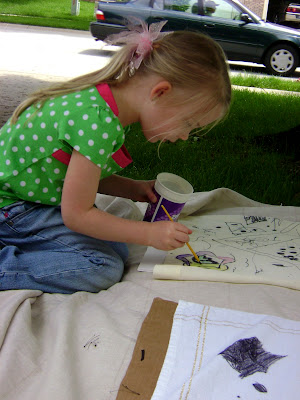
This project is one of the first things that I "pinned". The idea came from Filth Wizardry and is great because you can break it up into several steps and stretch it out over several days.
You can find almost everything you need at the dollar store. The store I went to didn't have the flour sack dish towels, but I was able to find a set of plain white ones that worked well. My oldest daughter prefers dresses so I picked out a pillowcase for her. I washed and dried both before we started. I spent $2 on the materials for the dress and used markers, elastic and paint I already had. Even if you had to purchase everything you can easily make the skirts or dresses for around $5 each. Such a deal!
Before "designing" the fabric I sewed two of the shorter sides of the dish towels together (right sides facing), making one very long rectangle. The best part about using the dish towels is that the edges are already hemmed and finished for you.
Our first step was drawing our designs. I gave the girls sharpies and let their imaginations fly.
The next step was the fun part...the painting! I watered down different colors of acrylic paint. You can buy the paint at your local craft store for less than a $1 a bottle.
There was a lot of fabric to cover so I used fairly large brushes. I gave my oldest a smaller brush to paint with so that she could paint more details on her fabric. Her younger sister did much better with the bigger brush. The paint will stain so make sure you protect the surface where you are painting. My lil' monkey is famous for spilling EVERYTHING so we did our painting outside.
Once the fabric was dry I washed and dried it a few times. With right sides together I sewed the open sides of the skirt together. To make the waistband casing I folded over the top edge about 1/2 an inch and sewed it down leaving a 1 inch opening to thread the elastic. Then I threaded the elastic and sewed up the opening. The directions are very similar to the simple skirt.
Viola!
For Lo's dress I used {THIS} super easy pillowcase dress tutorial from 402 Center Street. It's a great tutorial, perfect for novice sewers. I like the idea of using bias tape for the straps too.
Lo loves it too!


No comments:
Post a Comment